wholly gluten free pie crust instructions
A gluten-free pie crust offers a delicious and inclusive alternative for those with dietary restrictions. Made with specialized flours and careful techniques, it ensures a flaky, flavorful result.
Overview of Gluten-Free Baking
Gluten-free baking requires careful selection of ingredients and techniques to mimic the elasticity and structure traditionally provided by gluten. Common substitutions include gluten-free flours like rice, almond, or coconut flour, often combined with xanthan gum or guar gum to enhance texture. The ratio of fat to flour remains crucial for flakiness, and gentle dough handling is essential to prevent toughness. Chilling dough before rolling and using techniques like blind baking with pie weights can help maintain shape and texture. Achieving the right balance of ingredients and methods ensures delicious, gluten-free baked goods, including pie crusts, that are both tender and flavorful.
Importance of Using the Right Ingredients
Selecting the right ingredients is vital for a successful gluten-free pie crust. Gluten-free flours like almond, rice, or oat flour provide structure, while starches such as tapioca or potato starch enhance tenderness. Xanthan gum or guar gum can mimic gluten’s elasticity, ensuring the dough holds together. Cold fats like butter or shortening create a flaky texture, and minimal water prevents toughness. The balance of these components ensures a crust that is both durable and flavorful.
Understanding Gluten-Free Pie Crust Ingredients
Gluten-free pie crusts rely on carefully chosen ingredients to achieve structure and flavor without gluten. Flours, starches, fats, and liquids work together to create a tender, flaky crust.
Key Ingredients for a Successful Crust
The foundation of a gluten-free pie crust lies in its ingredients. Gluten-free flours, such as rice, almond, or oat flour, provide structure, while starches like tapioca or potato add lightness. Fats, including butter or coconut oil, ensure flakiness, and liquids, like water or eggs, bind the dough. Balancing these elements is crucial for achieving a tender, crisp crust that rivals traditional recipes.
Role of Gluten-Free Flours and Starches
Gluten-free flours and starches are essential for creating a pie crust without gluten. Rice flour adds structure, while almond flour provides flavor and texture. Tapioca and potato starches enhance tenderness and prevent sogginess. These ingredients work together to mimic the binding properties of gluten, ensuring a crust that is both sturdy and flaky. The right blend of flours and starches is critical for achieving the perfect texture in a gluten-free pie crust.
Importance of Fat and Liquid in the Dough
Fat, such as butter or shortening, is crucial for creating a flaky and tender crust. It coats gluten-free flours, preventing them from becoming dense. Liquid binds ingredients together, but too much can make the dough tough. The balance of fat and liquid ensures the crust is both sturdy and delicate, avoiding a crumbly texture. Proper hydration and fat distribution are vital for achieving a smooth, pliable dough that bakes into a perfect gluten-free pie crust.
Choosing the Right Gluten-Free Flours
Selecting the right gluten-free flours is essential for a successful pie crust. Popular options include almond, rice, and coconut flours, each offering unique textures and flavors. Combining them ensures the best results.
Popular Gluten-Free Flour Blends
Popular gluten-free flour blends for pie crusts include 1:1 baking flour, almond flour, and coconut flour. These blends offer unique textures and flavors, ensuring a flaky and tender crust. Almond flour adds richness, while coconut flour provides structure. Many recipes combine multiple flours to achieve the perfect balance. Using pre-mixed blends can simplify the process, but experimenting with custom combinations allows for tailored results.
How to Mix Your Own Gluten-Free Flour Blend
Mixing your own gluten-free flour blend involves combining base flours like rice or oat flour with starches such as tapioca or potato starch. Start with a 2:1 ratio of flours to starches, then add xanthan gum if needed for structure. Sift thoroughly to ensure even distribution. For pie crusts, using a mix of rice flour, almond flour, and millet flour creates a balanced texture. Experiment with ratios to achieve the perfect blend for your crust.
Step-by-Step Instructions for Making Gluten-Free Pie Crust
Combine gluten-free flours, starches, and seasonings, then mix in cold butter until crumbly. Gradually add ice-cold water, forming a dough. Chill, roll, and bake for a perfect crust.
Preparing the Dough
Start by combining gluten-free flours, starches, and a pinch of salt in a large bowl. Add cold butter, cutting it into small pieces until the mixture resembles coarse crumbs. Gradually incorporate ice-cold water, mixing until a dough forms. Wrap the dough in plastic wrap and chill for at least 30 minutes to allow the flours to hydrate and the fats to firm up, ensuring easier rolling and a flakier texture.
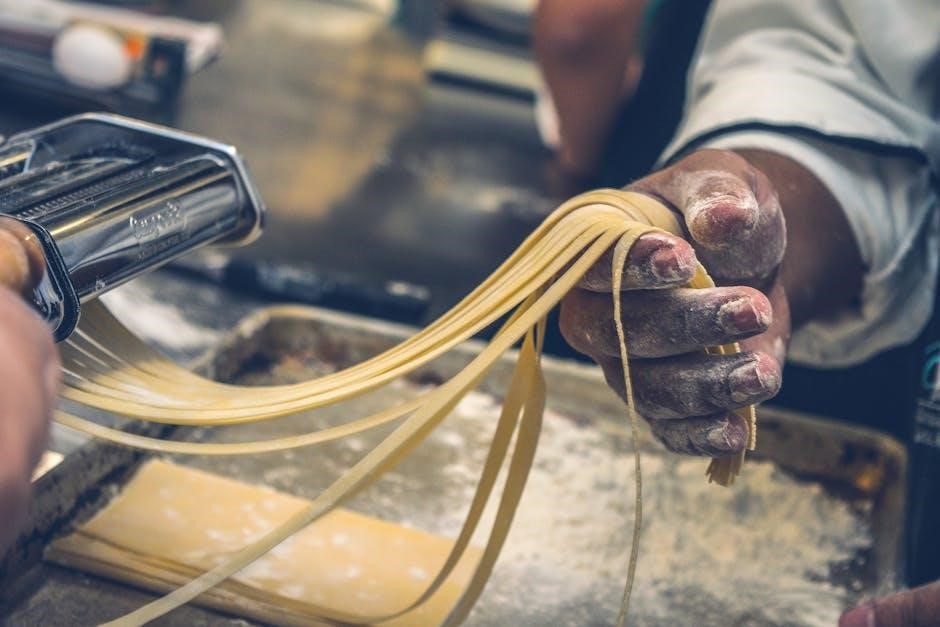
Rolling Out the Crust
On a lightly floured surface or between parchment paper, roll the chilled dough evenly, ensuring a uniform thickness of about 1/8 inch. Rotate the dough occasionally to maintain a circular shape and prevent sticking. If the dough warms up, refrigerate it for 10-15 minutes to firm before continuing. Carefully transfer the rolled crust to the pie dish, gently pressing it into the corners and trimming excess edges for a neat finish.
Blind Baking Techniques
For blind baking, preheat your oven to 375°F (190°C). Line the crust with parchment paper, filling it with pie weights or dried beans to prevent bubbling. Bake for 15-20 minutes, then remove the parchment and weights. Return the crust to the oven for an additional 5-7 minutes, until lightly golden. This ensures a crisp base for fillings. Allow the crust to cool completely before adding your desired filling to maintain texture and avoid sogginess.
Tips for Achieving the Perfect Crust Texture
Handle dough gently to avoid toughness. Use rice or almond flour for structure and crispiness. Blind baking ensures a golden, flaky crust with a tender texture.
Handling the Dough
Use cold ingredients to prevent the dough from becoming too soft. Avoid overmixing to maintain a tender texture. Gently roll the dough on parchment paper to prevent sticking. Chill the dough for at least 30 minutes to relax the flours. When transferring, handle it carefully to avoid stretching, which can cause uneven baking. Use a light touch to crimp edges, ensuring a flaky, delicate crust. Proper handling ensures a smooth, even texture in the finished pie crust.
Avoiding Common Mistakes
Overmixing the dough can lead to a tough crust, so mix ingredients just until combined. Using the wrong ratio of flours or starches can result in a dense texture. Ensure the butter is cold to achieve flakiness. Avoid overworking the dough when rolling it out, as this can cause shrinkage during baking. Don’t skip chilling the dough, as it helps the crust hold its shape. Gentle handling and proper temperature control are key to a successful gluten-free pie crust.
Ensuring Flakiness and Crispiness
For a flaky and crispy gluten-free pie crust, use cold butter and gently blend it with flour to create layers. Avoid overmixing, as it can toughen the dough. Bake at the right temperature to prevent sogginess. Blind baking with weights or beans helps crisp the bottom. Use a combination of flours with starches for texture. Chilling the dough ensures fats stay solid, promoting flakiness. Bake until golden for maximum crispiness and a tender crust.
Troubleshooting Common Issues
Common issues like shrinking, crumbly texture, or sogginess can arise. Ensure proper chilling, avoid overmixing, and bake thoroughly. Adjusting fat and liquid ratios can prevent these problems;
Why the Crust Might Shrink
Shrinkage often occurs due to overmixing dough, causing gluten-free flours to tighten. Insufficient chilling can lead to dough softening during baking, losing shape. Overbaking or incorrect oven temperature may also contribute. To prevent, ensure dough is well-rested, chilled, and baked at the right temperature. Using quality ingredients and proper techniques helps maintain structure and size, resulting in a professional finish.
Solving Crumbly or Tough Crust Problems
A crumbly or tough crust often results from overmixing or incorrect ingredient ratios. To fix, ensure flours and fats are well-balanced. Use cold ingredients and avoid overworking dough. Chilling helps relax gluten-free flours, preventing toughness. If baked too long, the crust may become rigid. Adjusting liquid content and ensuring even fat distribution can also resolve texture issues, yielding a tender and flaky crust. Blind baking with weights helps maintain structure. Always use fresh, high-quality ingredients for best results.
Preventing a Soggy Bottom
A soggy bottom can be avoided by blind baking the crust first. Use pie weights or beans to prevent air bubbles and ensure even cooking. Sealing the edges tightly prevents filling from seeping underneath. Chilling the dough before baking helps maintain structure. Always bake the crust until golden and fully set before adding the filling. These steps ensure a crisp, dry base for your gluten-free pie, enhancing both texture and flavor.
Storage and Reheating Instructions
Proper storage and reheating techniques are crucial for maintaining the texture and flavor of gluten-free pie crusts. Store in airtight containers, refrigerate for up to 3 days, or freeze for later use. Reheat gently to restore crispiness without overcooking.
How to Store Gluten-Free Pie Crust
Store gluten-free pie crust in an airtight container at room temperature for up to 2 days or refrigerate for 3-5 days. For longer storage, freeze the crust in a sealed container or plastic wrap for up to 3 months. Thaw frozen crusts in the fridge overnight to prevent sogginess. Always ensure the container is airtight to maintain freshness and prevent contamination. Proper storage helps preserve the crust’s texture and flavor for optimal baking results.
Freezing and Thawing Tips
For optimal texture, freeze gluten-free pie crust dough in an airtight container or wrapped tightly in plastic wrap for up to 3 months. Thaw overnight in the fridge to maintain structure. Avoid thawing at room temperature, as it may cause sogginess. For pre-baked crusts, freeze flat on a tray, then transfer to a sealed container. Always thaw frozen crusts slowly to preserve flakiness and prevent cracking during rolling.
Reheating the Crust for Optimal Texture
Reheat gluten-free pie crusts in a preheated oven at 350°F for 5-7 minutes, or until lightly warmed. Place the crust on a baking sheet to maintain its shape. For filled crusts, use a lower temperature (300°F) to prevent burning the filling. Allow the crust to cool slightly before serving to retain crispiness. Avoid microwaving, as it can make the crust soggy. Reheating ensures a fresh, flaky texture for your gluten-free pie creations.