miele induction cooktop operating instructions
Welcome to the Miele Induction Cooktop manual․ This guide provides essential information on safety, features, and proper usage to ensure optimal performance and longevity of your appliance, enhancing your cooking experience․
Importance of Following Operating Instructions
Adhering to Miele induction cooktop operating instructions is crucial for safety, performance, and longevity․ These guidelines ensure proper installation, prevent accidents, and maintain optimal functionality․ By following the manual, users can avoid damage to the cooktop and cookware, while also ensuring energy efficiency․ Miele emphasizes that only authorized personnel should handle repairs to guarantee safety and compliance with warranty terms․ Proper usage enhances cooking experiences and extends the appliance’s lifespan, making it essential to review and follow the instructions carefully before and during operation․
Overview of Miele Induction Cooktop Features
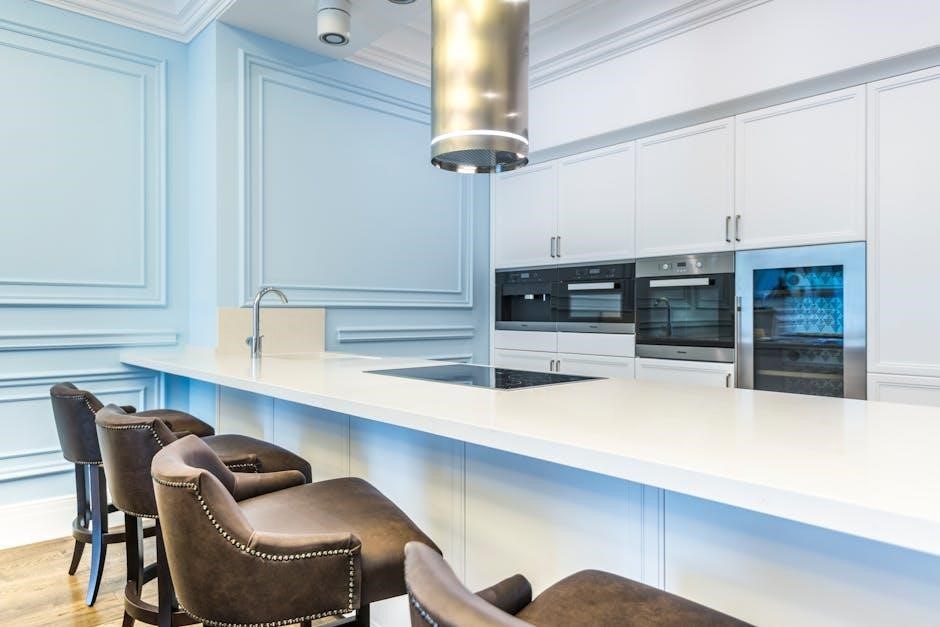
Miele induction cooktops are equipped with advanced features designed for precision and convenience․ They include touch-sensitive controls for easy operation, multiple cooking zones to accommodate various pot sizes, and energy-efficient technology that minimizes power consumption․ The cooktops also feature a durable DiamondFinish coating for easy cleaning and resistance to scratches․ Additional functionalities like automatic pan recognition, child safety locks, and residual heat indicators enhance safety and usability․ These features collectively provide a seamless and efficient cooking experience, catering to both novice and experienced home chefs․
Safety Precautions and Installation Requirements
Ensure safe installation by authorized technicians and follow all safety guidelines to prevent accidents․ Avoid outdoor use and keep children away from the cooktop during operation․
General Safety Guidelines
Always read the manual before using your Miele induction cooktop․ Ensure installation is done by a qualified technician to avoid hazards․ Never use the cooktop outdoors or near water․ Keep children away during operation․ Avoid placing metal objects near the cooktop, as they may heat up․ Use only induction-compatible cookware to prevent damage․ Do not leave the cooktop unattended while cooking․ Turn off the appliance and allow it to cool before cleaning․ Wear oven gloves when handling hot pans or surfaces․

Installation Requirements and Compatibility Checks
Ensure your Miele induction cooktop is installed by a qualified technician to meet safety and performance standards․ Verify the power supply matches the cooktop’s specifications․ Check that the cookware is induction-compatible, as only magnetic-based pans will work․ Maintain proper spacing around the cooktop for ventilation․ Avoid installing near flammable materials․ Follow the manufacturer’s guidelines for surface preparation and electrical connections․ This ensures safe and efficient operation, preventing potential hazards and optimizing cooking performance․ Adhere to these requirements to guarantee longevity and reliability of your appliance․

Operating the Miele Induction Cooktop
Select the desired cooking zone and adjust power levels using the intuitive touch controls․ Ensure the cookware is induction-compatible for optimal performance and safety during operation․
Selecting Cooking Zones and Adjusting Power Levels
Effortlessly choose your desired cooking zone using the touch controls or sensor switches․ The induction cooktop automatically detects the size of your cookware, optimizing heat distribution․ Adjust power levels seamlessly to achieve precise temperature control․ For added convenience, the cooktop features pre-set options for common cooking tasks․ Ensure your cookware is compatible with induction technology for efficient and safe operation․ Regularly clean the cooking surface to maintain optimal performance and prevent damage to the appliance․
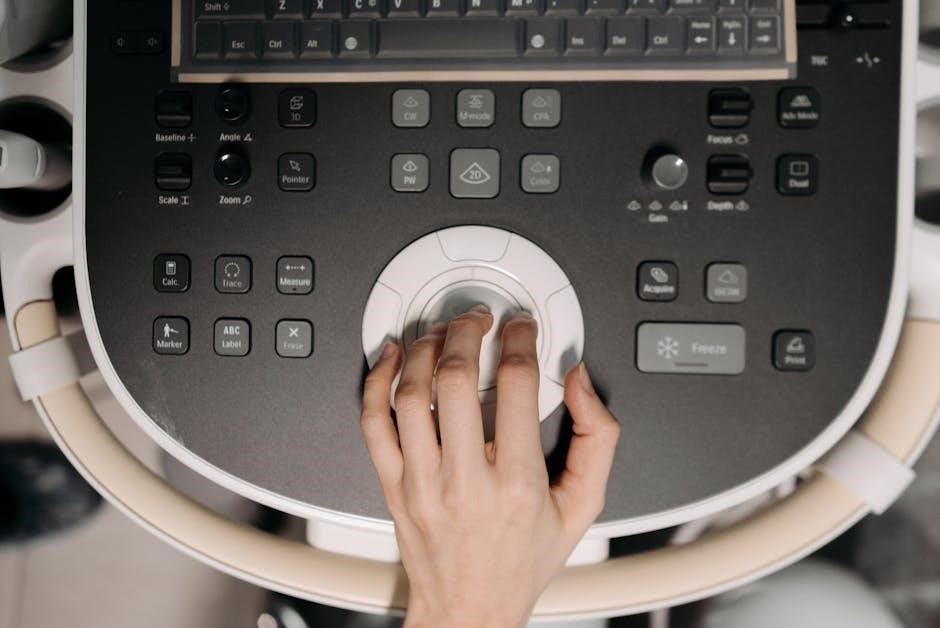
Using Touch Controls for Precise Temperature Management
Navigate effortlessly with Miele’s intuitive touch controls, designed for precise temperature management․ The sensor switches activate automatically when a pan is placed on the cooking zone․ Adjust power levels with a gentle touch, and utilize pre-set options for tasks like simmering or boiling․ The cooktop also features a booster function for rapid heating․ Ensure compatibility with induction-ready cookware for optimal performance․ Regular cleaning of the touch surface ensures smooth operation․ These advanced controls provide unparalleled control over your cooking experience, making meal preparation efficient and enjoyable․

Maintenance and Cleaning Tips
Regular cleaning is essential to maintain the performance and appearance of your Miele induction cooktop․ Use recommended ceramic cleaning agents to prevent surface damage and ensure optimal functionality․
Regular Cleaning to Prevent Damage
Regular cleaning is crucial for maintaining the performance and longevity of your Miele induction cooktop․ Use a soft, damp cloth to wipe the surface after each use, ensuring no food residue remains․ For tougher stains, apply a Miele-approved ceramic cleaning agent, avoiding abrasive materials that may scratch the surface․ After cleaning, rinse with a clean, damp cloth and dry thoroughly to prevent water spots․ Cleaning while the surface is still warm can help remove stubborn stains more effectively․ Always unplug the cooktop before cleaning to ensure safety․
Recommended Cleaning Agents for Ceramic Surfaces
For maintaining your Miele induction cooktop’s ceramic surface, use Miele-approved cleaning agents or gentle, non-abrasive cleaners specifically designed for ceramic surfaces․ Avoid harsh chemicals, bleach, or scouring pads, as they may damage the finish․ A soft, lint-free cloth or paper towel should be used to apply the cleaner, ensuring no residue is left behind․ Regular use of these agents will keep the cooktop looking new and prevent stubborn stains from forming․ Always follow the product instructions for optimal results․
Troubleshooting Common Issues
This section helps identify and resolve common issues like error codes, cookware incompatibility, and unexpected shutdowns․ Resetting the cooktop and checking power supply often solve problems․
Identifying and Resolving Error Codes
Identifying and resolving error codes is crucial for maintaining your Miele induction cooktop’s performance․ Error codes such as E0, E1, and E2 indicate specific issues like power supply problems or sensor malfunctions․ To resolve these, reset the cooktop by disconnecting power for one minute․ If the issue persists, contact Miele Service for professional assistance․ Regular cleaning of the cooktop surface can help prevent many common errors and ensure optimal functioning․
Addressing Malfunctioning Cooking Zones
If a cooking zone on your Miele induction cooktop is not functioning properly, first ensure the cookware is compatible and correctly placed․ Check for error codes and reset the cooktop by disconnecting power for one minute․ If the issue persists, contact Miele Service for professional assistance․ Regular maintenance, such as cleaning the cooktop and ensuring proper installation, can help prevent zone malfunctions․ Always use induction-compatible cookware to optimize performance and avoid damage to the appliance․

Cookware Compatibility and Usage
Compatible cookware, such as cast iron or stainless steel, is essential for Miele induction cooktops to function properly, ensuring efficient heat transfer and optimal cooking performance․
Understanding Suitable Cookware for Induction Cooking
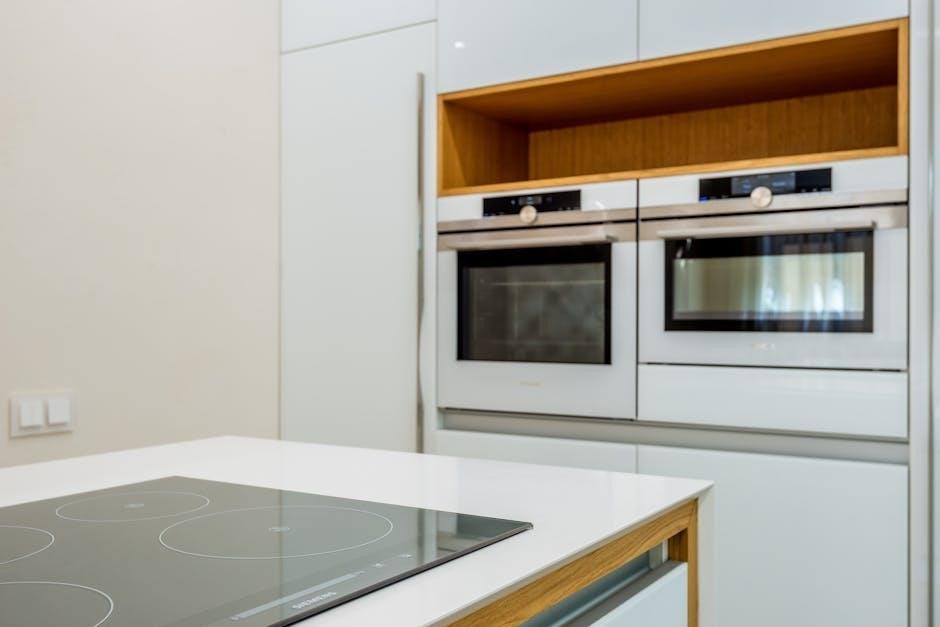
For optimal performance, Miele induction cooktops require cookware with magnetic bases, such as cast iron or stainless steel․ These materials ensure efficient heat transfer․ Avoid using aluminum or glass cookware, as they are not compatible with induction technology․ Always check for the induction-compatible symbol on cookware․ Proper cookware selection prevents poor performance and ensures safe operation․ Refer to Miele’s guidelines for recommended cookware types to maximize your cooking experience and maintain appliance efficiency․
Optimizing Performance with Induction-Compatible Pans
Using induction-compatible pans with magnetic bases ensures efficient energy transfer and even heating․ Choose cookware with a thickness of 3-5 mm for optimal performance․ Avoid oversized pans, as they may not align with cooking zones․ Regularly clean pans to maintain contact quality․ For best results, match pan size to the cooking zone to minimize energy loss․ Miele recommends using high-quality, induction-specific cookware to maximize efficiency and cooking speed, ensuring a seamless and energy-efficient culinary experience․

Energy Efficiency and Cooking Techniques
Miele induction cooktops offer high energy efficiency by directly heating cookware, reducing energy loss․ Advanced cooking techniques like precise temperature control enable optimal results for simmering, frying, and more․
Maximizing Energy Efficiency While Cooking
Miele induction cooktops are designed to minimize energy consumption․ By directly heating the cookware, they reduce heat loss․ Use cookware with ferrous materials for optimal efficiency․ Maintain a clean cooktop surface to ensure proper heat transfer․ Avoid overheating by using the correct power levels․ Utilize the timer function to avoid prolonged cooking․ For simmering, reduce power to low settings to conserve energy․ Regular cleaning prevents residue buildup, ensuring efficient performance․ These practices enhance energy savings while maintaining cooking quality․
Advanced Cooking Techniques for Induction Cooktops
Explore advanced techniques to elevate your cooking with Miele induction cooktops․ Utilize rapid heat boost for quick searing and precise temperature control for delicate dishes like sauces or fish․ Master simmering by adjusting power levels to maintain consistent low heat․ Pair induction-compatible cookware for optimal heat distribution․ Experiment with multi-zone cooking for complex meals, ensuring even heating across all zones․ For best results, use thicker, heavy-bottomed pans made of ferrous materials․ These techniques maximize efficiency and enhance culinary creativity, making induction cooking versatile and enjoyable․

Warranty and Service Information
Miele offers comprehensive warranty coverage for induction cooktops, ensuring protection against defects․ Contact Miele Service for professional maintenance and repairs, performed by authorized technicians for optimal appliance performance․
Understanding Miele’s Warranty Coverage
Miele’s warranty ensures comprehensive coverage for your induction cooktop, protecting against manufacturing defects․ The standard warranty typically covers parts and labor for a specified period, often ranging from one to five years, depending on the model․ Registration may be required to activate full warranty benefits․ Miele’s commitment to quality is reflected in its extensive coverage, providing peace of mind for users․ Regular maintenance and adherence to operating instructions are essential to uphold warranty validity․ For detailed terms, refer to the official Miele warranty documentation or contact their customer support team․
Contacting Miele Service for Maintenance and Repairs
For maintenance or repairs, contact Miele’s authorized service team through their official website or customer support hotline․ Ensure to provide your appliance’s model number (e․g․, KM5947-5954) and a detailed description of the issue․ Miele’s trained technicians will handle repairs, ensuring compliance with safety and quality standards․ Avoid unauthorized services to maintain warranty validity․ Visit Miele’s online portal or refer to the manual for contact information and regional service centers․ Prompt assistance guarantees optimal performance and extends the lifespan of your induction cooktop․
By following the Miele Induction Cooktop operating instructions, you ensure safety, optimal performance, and longevity of your appliance, enhancing your overall cooking experience with precision and efficiency․
Final Tips for Optimal Performance
To maximize your Miele Induction Cooktop’s performance, always use compatible cookware, clean the surface regularly, and avoid harsh chemicals․ Ensure the cooktop is installed correctly and maintained by authorized technicians․ Use energy-efficient settings and adjust power levels according to your cooking needs․ Keep the appliance unattended only when necessary and store it properly when not in use․ By following these guidelines, you can enjoy precise temperature control, faster cooking times, and long-lasting durability of your Miele Induction Cooktop․
Importance of Regular Maintenance for Longevity
Regular maintenance is crucial for extending the lifespan of your Miele Induction Cooktop․ Clean the ceramic surface after each use with a suitable cleaning agent to prevent residue buildup․ Avoid using abrasive materials that could scratch the cooktop․ Check for any issues like malfunctioning zones or error codes and address them promptly․ Ensure all connectors and components are secure to maintain proper functionality․ By prioritizing maintenance, you can ensure your cooktop operates efficiently, retains its aesthetic appeal, and continues to deliver exceptional performance for years to come․