cooke & lewis induction hob manual
Article Plan: Cooke & Lewis Induction Hob Manual
This manual details the safe installation, operation, and maintenance of the Cooke & Lewis induction hob (model CLCER30)․ It emphasizes qualified installation and child safety precautions․
Welcome to the world of efficient and modern cooking with your new Cooke & Lewis Induction Hob! This appliance, specifically the CLCER30 model featuring two cooking zones, is designed to provide precise temperature control and rapid heating for all your culinary needs․
Before you begin, it’s crucial to understand that proper installation is paramount for both safety and optimal performance․ This hob must be installed by a competent person or qualified electrician, adhering strictly to the manufacturer’s instructions and current wiring regulations․
This manual serves as your comprehensive guide, covering everything from unpacking and initial inspection to troubleshooting and responsible disposal․ Prioritize safety – accessible parts will get hot during use!
Safety Precautions
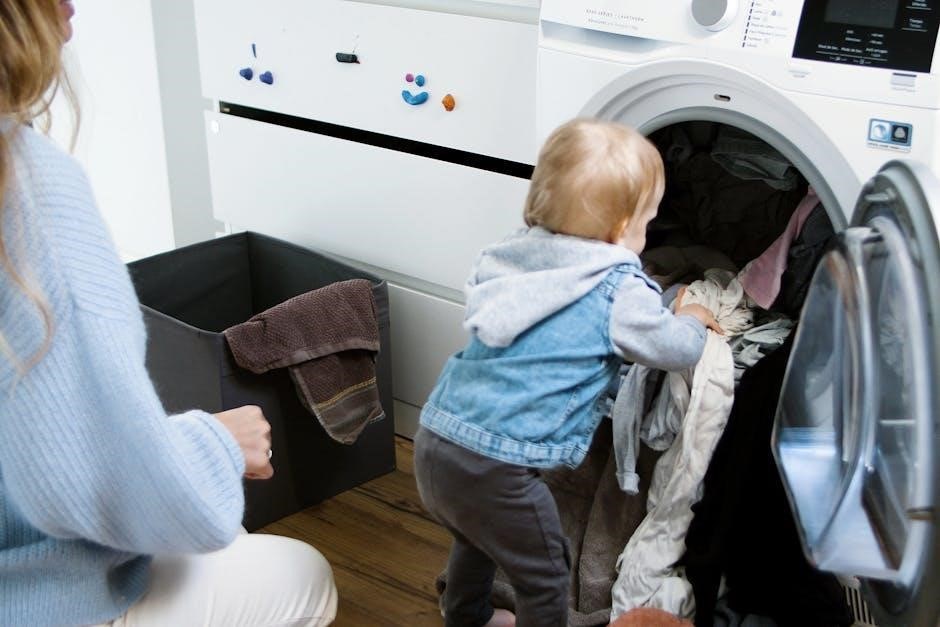
Your safety is our utmost concern․ This Cooke & Lewis induction hob generates heat during and after use; surfaces will become hot․ Keep young children away from the appliance at all times, and supervise older children to prevent accidental contact․
Crucially, all installation work must be performed by a qualified electrician or competent person, following the provided instructions and adhering to current wiring regulations․ Ensure an all-pole disconnection switch with at least 3mm contact separation is incorporated into the fixed wiring․
Damaged power cables pose a significant hazard and must be replaced immediately․ Never attempt to repair the appliance yourself․ Prioritize a safe cooking environment for you and your family․
General Safety Warnings
This appliance is intended for domestic use only․ Misuse may result in injury or damage․ Do not use the hob with damaged cords or plugs, or after any malfunction․ Avoid placing metallic objects on the hob surface when not in use, as they can heat up․

Never leave the hob unattended during operation․ Be cautious when cooking with flammable liquids․ Ensure adequate ventilation during and after use․ The manufacturer emphasizes compliance with European safety legislation, but hot surfaces remain a risk․
Regularly inspect the hob for any signs of damage․ Do not allow children to operate or play near the appliance․ Always disconnect the hob from the power supply before cleaning or maintenance․
Child Safety
This hob gets hot during and after use, presenting a burn risk to children․ Constant supervision is crucial when children are near the appliance․ The manufacturer strongly advises keeping the hob out of reach of babies and small children at all times․
Accessible parts can become hot, so teach children about the dangers of touching the hob surface․ Never allow children to sit or climb on the hob․ Ensure children understand that the hob is not a toy․
Means for isolating the appliance must be incorporated into the fixed wiring to allow for safe disconnection․ Prioritize child safety by implementing these preventative measures․
Electrical Safety & Installation Requirements
All installation work must be performed by a competent person or qualified electrician․ Incorrect installation voids warranties and creates safety hazards․ This appliance must adhere to current wiring regulations․
An all-pole disconnection switch, with a contact separation of at least 3mm in all poles, is required in the fixed wiring․ This allows for safe isolation during maintenance or emergencies․
Damaged power cables must be replaced immediately by a qualified professional․ Ensure the electrical supply matches the hob’s specifications․ Strict adherence to manufacturer’s instructions is paramount for safe operation and compliance with European safety legislation․
Getting Started: Unpacking and Initial Inspection
Carefully unpack the Cooke & Lewis induction hob, checking for any visible damage incurred during transit․ Retain the packaging for potential future transport or returns․ Verify all components are present according to the ‘Package Contents Verification’ section of this manual․
Note that items 2 and 3 (likely mounting brackets) are pre-fitted at the factory, eliminating the need for assembly․ Inspect the hob surface for scratches or defects․ If any damage is found, do not install the appliance and contact the retailer immediately․
Prior to installation, familiarize yourself with the safety warnings detailed in the ‘Safety Precautions’ section․
Package Contents Verification
Upon unpacking your Cooke & Lewis induction hob (CLCER30), ensure all listed components are present․ The package should include the induction hob itself, an instruction manual (this document), and potentially mounting brackets – items 2 and 3 are typically pre-fitted, so their separate presence isn’t always guaranteed․
Carefully check for any missing parts․ While the provided documentation doesn’t list a specific itemized component list, confirm the presence of essential fixings if not pre-attached․ If any components are missing or damaged, do not proceed with installation․
Contact the retailer or manufacturer immediately to report the discrepancy and arrange for replacements before commencing installation․
Installation Guide
Prior to installation of your Cooke & Lewis CLCER30 induction hob, a competent person or qualified electrician must perform all work․ This appliance requires correct installation adhering strictly to the manufacturer’s instructions for your safety․ Installation begins with careful worktop preparation, ensuring it’s suitable and stable․
The hob’s placement and securing are critical; follow the provided dimensions and use appropriate fixings․ Remember items 2 & 3 are often pre-fitted, simplifying assembly․ Crucially, an all-pole disconnection switch with at least 3mm contact separation must be incorporated into the fixed wiring․
Refer to section 5 for detailed installation steps․
Qualified Person Requirement
Installation of the Cooke & Lewis CLCER30 induction hob must be carried out by a competent person or a fully qualified electrician․ This is non-negotiable and vital for ensuring safe and correct operation, adhering to current wiring regulations․ The manufacturer strongly emphasizes this requirement to prevent hazards․
A ‘competent person’ possesses the necessary skills, knowledge, and experience to perform electrical installations safely and legally․ They understand all-pole disconnection requirements and can integrate the hob into your existing electrical system correctly; Incorrect installation voids warranties and poses significant safety risks․
Do not attempt self-installation if you lack the necessary qualifications․
Worktop Preparation
Prior to installing the Cooke & Lewis CLCER30 induction hob, careful worktop preparation is essential․ Ensure the work surface is heat-resistant, stable, and level․ The hob requires a flush, flat surface for proper operation and to prevent potential hazards․
Cutout dimensions are critical; consult the full installation guide for precise measurements․ Any gaps between the hob and the worktop must be sealed with heat-resistant sealant to prevent liquid or debris from entering the appliance’s internal components․
Adequate ventilation is also necessary; ensure sufficient space around the hob for airflow, as specified in the detailed instructions․
Hob Placement and Securing
Carefully position the Cooke & Lewis CLCER30 induction hob into the prepared worktop cutout․ Ensure it sits flush and level, utilizing appropriate shims if necessary to correct any minor imperfections in the surface․

Secure the hob using the provided fixing clips․ These clips are typically pre-fitted at the factory, simplifying the installation process․ Confirm they firmly grip both the hob frame and the underside of the worktop, preventing movement during operation․
Double-check the stability of the hob before proceeding with the electrical connection․ A securely mounted hob is crucial for safe and reliable performance․
Electrical Connection (All-Pole Disconnection Switch)
A qualified electrician must perform all electrical connections․ The Cooke & Lewis CLCER30 requires connection to a suitable electrical supply, adhering to current wiring regulations․
Crucially, an all-pole disconnection switch is mandatory․ This switch, with a contact separation of at least 3mm in all poles, must be incorporated into the fixed wiring․ It allows for complete isolation of the hob for maintenance or emergencies․
Ensure the power cable is undamaged before connection․ The disconnection switch should be readily accessible after installation, facilitating safe operation and servicing․

Understanding the Hob’s Features
The Cooke & Lewis CLCER30 induction hob offers efficient and precise cooking․ It utilizes electromagnetic energy to heat cookware directly, resulting in faster heating and energy savings․
This model features two cooking zones, providing flexibility for various pot and pan sizes․ The control panel allows for intuitive operation, with easy-to-use controls for power level adjustment and zone selection․
Induction cooking is safer as the hob surface remains relatively cool to the touch, reducing the risk of burns․ Familiarizing yourself with these features ensures optimal performance and a safe cooking experience․
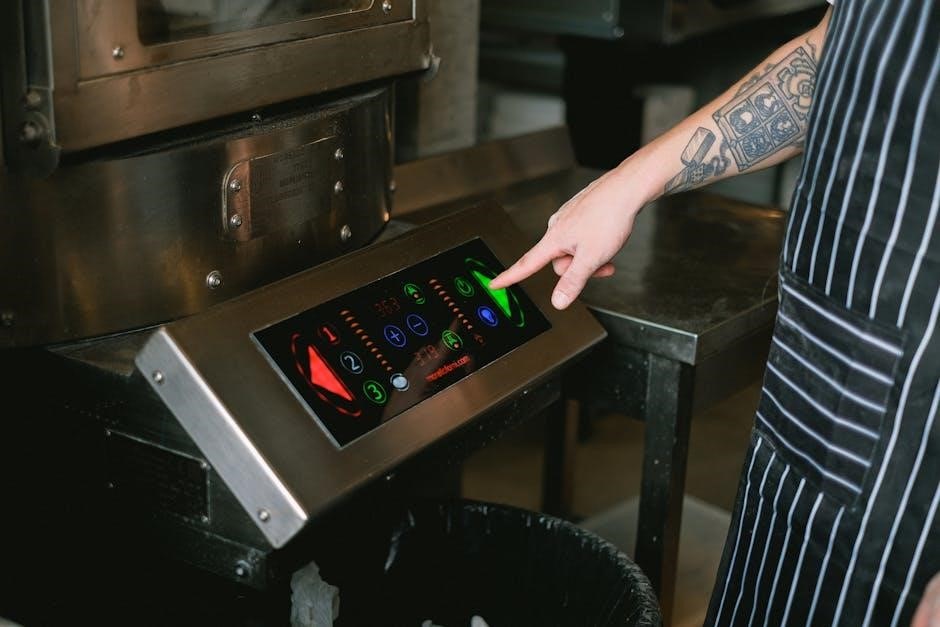
Control Panel Overview
The Cooke & Lewis CLCER30 induction hob’s control panel is designed for ease of use․ It features touch-sensitive controls, eliminating the need for physical buttons․ Each zone has dedicated controls for power level adjustment, typically ranging from 1 to 9 (or similar)․
Power on/off functionality is integrated into the panel, often indicated by a distinct symbol․ Zone selection is usually achieved through illuminated indicators, clearly showing the active cooking area․
Some models may include additional features like a timer or child lock, also controlled via the touch panel․ Understanding the symbols and layout is crucial for efficient operation․
Zone Identification (2 Zones ⏤ CLCER30)
The Cooke & Lewis CLCER30 induction hob features two independent cooking zones․ These zones are specifically designed for induction-compatible cookware, offering rapid and efficient heating․
Each zone is clearly defined on the hob’s surface, often indicated by a circular marking․ The zones may vary slightly in size to accommodate different pot and pan dimensions․
Zone selection is performed via the control panel, activating the desired cooking area․ The hob automatically detects the presence of suitable cookware within each zone, initiating the heating process․ Understanding the location and functionality of each zone is key to maximizing cooking performance․
Operating Instructions
To begin, ensure the hob is powered on․ Select the desired cooking zone using the control panel – a visual indicator will confirm your selection․ Adjust the power level using the corresponding controls, ranging from low to high settings for simmering or rapid boiling․
The hob’s responsive controls allow for precise temperature adjustments․ Always use cookware suitable for induction hob surfaces․ Monitor the cooking process, as induction heating is very efficient․ To switch off a zone, select it and reduce the power to zero, or use the power off function․
Powering On and Off

The Cooke & Lewis induction hob doesn’t have a traditional on/off switch․ Instead, it activates when suitable cookware is placed on a zone and a power level is selected․ Removing the cookware will automatically deactivate that zone․

To completely power down the hob, ensure all zones are set to zero power․ Some models may feature a ‘lock’ function; consult the control panel overview for details․ Remember that the hob surface will remain hot after use, even when deactivated, so exercise caution․ Always disconnect from the mains for extended periods of non-use․
Selecting a Cooking Zone
The Cooke & Lewis CLCER30 induction hob features two distinct cooking zones․ To select a zone, simply touch the corresponding zone selection icon on the control panel․ The selected zone will typically be indicated by a visual cue, such as an illuminated indicator light or a highlighted outline․
Ensure your cookware is compatible with induction technology and appropriately sized for the chosen zone․ Incorrect cookware will not heat up․ Once a zone is selected, you can adjust the power level using the control panel’s adjustment features, tailoring the heat to your cooking needs․
Temperature/Power Level Adjustment
After selecting a cooking zone on your Cooke & Lewis CLCER30 induction hob, you can adjust the temperature or power level․ This is typically achieved using the “+” and “-” buttons on the control panel․ Each press will incrementally increase or decrease the heat setting․
The hob may display power levels numerically (e․g․, 1-9) or use descriptive terms․ Higher numbers generally correspond to higher heat output․ Experiment to find the optimal setting for your dish․ Remember that induction heating is very responsive, so adjustments take effect quickly․ Always start with a lower setting and increase as needed․
Care and Maintenance
Regular cleaning is essential for maintaining your Cooke & Lewis induction hob; Always ensure the hob is cool and switched off before cleaning․ Use a soft cloth and mild detergent to wipe the ceramic surface; Avoid abrasive cleaners or scouring pads, as these can cause scratches․
For stubborn stains, a dedicated ceramic hob cleaner may be used, following the product instructions carefully․ Wipe away any cleaner residue with a clean, damp cloth․ Do not immerse the hob in water․ Regularly inspect the power cord for damage and address any issues promptly․ Proper care ensures longevity and optimal performance․
Troubleshooting Common Issues
If the hob doesn’t power on, check the power supply and ensure the all-pole disconnection switch is engaged․ Verify the hob is correctly installed by a qualified person․ If a zone isn’t heating, confirm it’s selected and the power level is adjusted․ Ensure compatible cookware is being used – induction requires ferromagnetic bases․
Error codes may appear; consult the full manual for specific meanings․ If issues persist, disconnect the hob and contact a qualified electrician․ Avoid self-repair․ Regularly checking for proper functionality and addressing minor concerns promptly can prevent larger problems․ Prioritize safety and professional assistance when needed․
Technical Specifications
The Cooke & Lewis CLCER30 induction hob features two cooking zones, designed for efficient and rapid heating․ It requires a dedicated electrical circuit with an all-pole disconnection switch, ensuring a minimum contact separation of 3mm․ Detailed voltage and power consumption specifications are available in the complete manual․
The hob’s dimensions and cutout requirements are crucial for proper installation․ It adheres to current European safety legislation, though surfaces will become hot during and after use․ This appliance is designed for domestic use only․ Refer to the full documentation for precise technical data and compliance information, including recycling guidelines․
Recycling and Disposal Information
Responsible disposal of your Cooke & Lewis induction hob is crucial for environmental protection․ Do not dispose of this appliance with unsorted household waste․ Instead, utilize designated collection points for electrical and electronic equipment recycling․ This ensures proper handling of components and reduces landfill impact․
Components may contain valuable materials recoverable through recycling processes․ Local regulations govern the disposal of electrical appliances; consult your municipality for specific guidelines․ Improper disposal can harm the environment and human health․ By recycling, you contribute to a sustainable future and comply with waste electrical equipment directives․