
ryobi miter saw instruction manual
Safety Precautions
Always wear eye protection and ensure loose clothing is tied back. Keep the work area clean and well-lit. Clamp the saw to a sturdy workbench for stability. Never operate the saw on the floor or in a crouched position. Keep children and bystanders away. Read the manual thoroughly before use.
- Ensure the saw is properly assembled and secured.
- Keep hands away from the blade during operation.
- Avoid wearing loose jewelry that could get caught.
- Never reach across the blade while cutting.
- Disconnect the power when changing blades or adjusting.
General Safety Precautions
Before operating your Ryobi miter saw, ensure the work area is clean, well-lit, and free from obstructions. Always wear safety glasses and keep loose clothing tied back. Clamp the saw firmly to a sturdy workbench to prevent movement during use. Never operate the saw on the floor or in a crouched position. Keep children and bystanders at a safe distance. Read the manual thoroughly to understand all safety guidelines and operational procedures.
- Ensure the saw is properly assembled and secured before use;
- Keep hands and fingers away from the blade’s path during operation.
- Avoid wearing loose jewelry that could get caught in moving parts.
- Do not reach across the blade while cutting materials.
- Disconnect the power source when changing blades or making adjustments.
Personal Protective Equipment
Wearing appropriate personal protective equipment (PPE) is crucial when operating a Ryobi miter saw. Always wear safety glasses or goggles to protect your eyes from debris. A dust mask is recommended to avoid inhaling sawdust. Hearing protection, such as earplugs or earmuffs, should be used to prevent noise exposure. Keep loose clothing and long hair tied back to avoid entanglement with moving parts. Wear snug-fitting gloves for better grip and control, but ensure they are not so loose that they interfere with operations. Avoid wearing jewelry that could get caught in the saw. Proper PPE ensures a safer working environment and minimizes the risk of injury.
Workpiece Preparation
Proper workpiece preparation is essential for safe and accurate cutting with your Ryobi miter saw. Always ensure the workpiece is clean, dry, and free from debris. Remove any loose material or splinters that could interfere with the cut. Secure the workpiece firmly to the saw table using clamps or hold-downs to prevent movement during operation. Align the workpiece against the fence to ensure straight cuts. Double-check the measurements and markings before making a cut. Use a push stick or other safety devices for smaller workpieces to maintain control. Never cut materials that are too small or unstable, as they may cause accidents. Proper preparation ensures precise results and reduces the risk of injury or damage to the saw. Always follow the manufacturer’s guidelines for specific materials and thicknesses.

Understanding Your Ryobi Miter Saw
Your Ryobi miter saw is designed for precision cutting, offering versatility for various woodworking projects. It features a robust design, easy-to-use controls, and adjustable settings for accuracy.
Overview of the Miter Saw
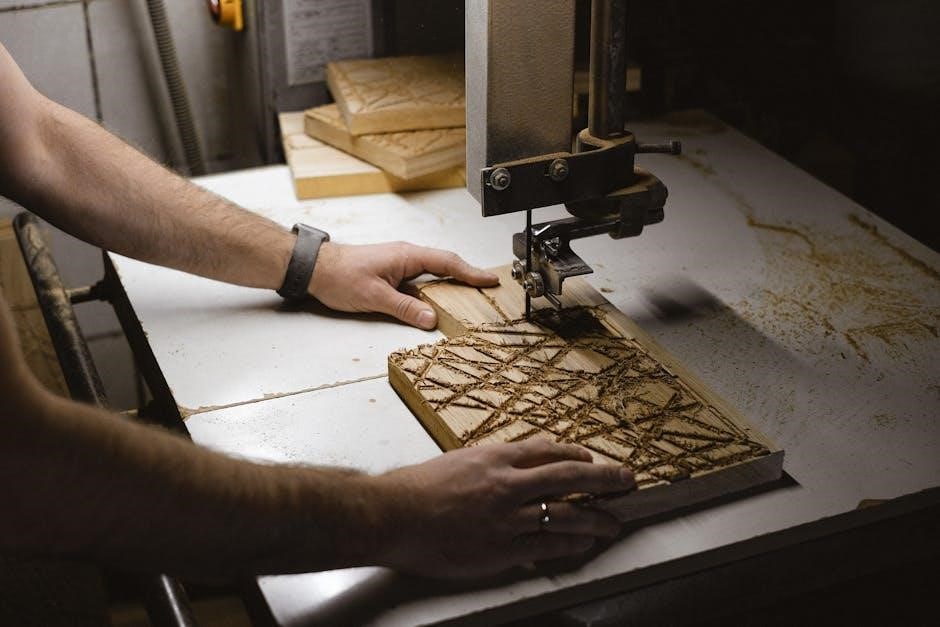
Your Ryobi miter saw is a versatile power tool designed for making precise angled cuts in wood and other materials. It features a sturdy, compact design and is ideal for various woodworking projects, from framing to trimming. The saw includes a rotating table for miter cuts and an adjustable blade for bevel cuts, allowing for flexibility in your work. With its powerful motor and sharp blade, it delivers clean, accurate results. The saw is lightweight yet durable, making it easy to transport and set up in your workshop or on-site. Whether you’re a DIY enthusiast or a professional, this tool is engineered to meet your cutting needs efficiently and safely.
- Designed for precision and versatility.
- Includes miter and bevel cutting capabilities.
- Ideal for both small and large-scale projects.
- Lightweight yet robust for reliable performance.
Identifying Key Components
Your Ryobi miter saw is equipped with essential components designed for precision and ease of use. The miter table allows for accurate angle adjustments, while the saw arm holds the blade and enables smooth up-and-down movement. The blade itself is a high-quality cutting tool, and the bevel adjustment feature lets you tilt the blade for angled cuts. The fence provides a stable reference for aligning your workpieces. Additional features include a comfortable handle for controlling the saw arm and a dust collection port to keep your workspace clean. Understanding these components is crucial for optimal performance and safety.
- Miter table: For precise angle adjustments.
- Saw arm: Holds the blade and enables cutting motion.
- Blade: Designed for clean, accurate cuts.
- Bevel adjustment: Allows for tilted cuts.
- Fence: Ensures stable workpiece alignment.
- Handle: Provides control during operation.
- Dust port: Facilitates dust collection.
Miter and Bevel Functions Explained
The miter function allows you to make precise angled cuts by rotating the miter table. This is ideal for creating joints or fitting pieces together at specific angles. The bevel function, on the other hand, enables you to tilt the blade relative to the table, perfect for creating angled cuts on the edge of the material. Combined, these functions provide versatility for various woodworking projects. The miter lock lever secures the table in place, ensuring accuracy, while the bevel adjustment allows for smooth tilting. Both features are designed to enhance your cutting capabilities and deliver professional-grade results with ease.
- Miter: Rotates for angled cuts up to 45 degrees.
- Bevel: Tilts blade for edge cuts.
- Lock lever: Ensures miter table stability.
- Combined use: Achieve complex cuts effortlessly.
Operating the Miter Saw
Align the material firmly against the fence and bed. Grip the handle securely, squeeze the trigger, and lower the blade smoothly through the workpiece. Maintain steady control throughout the cut for precise results.
- Hold the saw steady and apply consistent pressure.
- Ensure the workpiece remains flush against the fence.
- Let the blade complete the cut before releasing.
Assembly and Setup
Begin by clamping the miter saw to a sturdy workbench to ensure stability. Lock the miter table by pushing the miter lock lever to prevent movement during setup. Ensure the saw arm (bevel function) is securely locked in its upright position. Align the blade with the cutting line on the workpiece and verify the fence is straight and securely tightened. If using a miter saw stand, follow the manufacturer’s instructions for assembly and attachment. Double-check that all bolts and screws are tightened to the recommended torque specifications, as outlined in the manual. Finally, test the saw by making a small practice cut to ensure proper alignment and functionality before proceeding with your project.
- Ensure the saw is properly secured to the workbench.
- Align the blade with the cutting line accurately.
- Verify the fence is straight and tightly secured.
- Test the saw with a small practice cut.

Making Precise Cuts
To achieve accurate cuts, align the workpiece firmly against the fence and ensure it is flush with the table. Use the laser guide or alignment marker to position the blade correctly. Lock the miter table in place before starting the cut to prevent unintended movement. Maintain steady, consistent pressure on the saw handle, moving it smoothly through the workpiece. For bevel cuts, tilt the blade to the desired angle and double-check the alignment. Always use a push stick or other safety device for narrow or small workpieces to maintain control and safety. After completing the cut, allow the blade to stop completely before raising the saw arm or moving the workpiece.
- Use the laser guide for precise blade alignment.
- Ensure the workpiece is flush against the fence.
- Lock the miter table before initiating cuts.
- Apply steady, consistent pressure on the saw handle.
- Activate the laser guide for precise cut alignment.
- Adjust miter and bevel controls for angled cuts.
- Use the sliding arm for cutting wider materials.
- Engage the depth stop for consistent cut depth.
- Connect a vacuum to the dust collection port.
- Clean the blade and table after each use.
- Check and tighten loose bolts periodically.
- Address vibration by balancing the blade.
- Align the fence for accurate cuts.
- Clean the saw table and blade regularly.
- Lubricate moving components for smooth operation.
- Tighten loose bolts to ensure stability.
- Inspect and replace the blade as needed.
- Store the saw properly to prevent damage.
- Check blade and fence alignment for straight cuts.
- Ensure the miter table is locked before cutting.
- Inspect the blade for damage or imbalance.
- Lubricate moving parts to reduce stiffness.
- Consult the manual for specific troubleshooting guidance.
- Always follow safety guidelines.
- Practice proper cutting techniques.
- Refer to the manual for maintenance tips.
- Enjoy precise and efficient cutting.
Using Additional Features
The Ryobi miter saw offers advanced features to enhance cutting precision and versatility. Utilize the laser guide to align cuts accurately before starting. For angled cuts, adjust the miter and bevel controls, ensuring they are locked securely. The sliding arm feature allows for wider workpieces, while the depth stop enables consistent depth control for repetitive cuts. Take advantage of the built-in dust collection port by attaching a vacuum to minimize debris. For smooth operation, regularly lubricate moving parts as specified in the manual. Explore the adjustable fence extensions for supporting larger materials and use the quick-release clamp for securing workpieces quickly. These features, when used correctly, optimize productivity and ensure professional-grade results.
Maintenance and Troubleshooting
Routine Maintenance
Regularly clean the saw table and blade to prevent dust buildup. Lubricate moving parts to ensure smooth operation. Replace worn or damaged blades promptly.
Troubleshooting Common Issues
If the saw vibrates excessively, check blade balance. For uneven cuts, ensure the fence is aligned. Refer to the manual for specific solutions to common problems.
Regular maintenance is crucial for optimal performance and longevity of your Ryobi miter saw. Clean the saw table, blade, and surrounding areas frequently to remove dust and debris. Lubricate moving parts, such as the pivot points and bearings, to ensure smooth operation. Check and tighten any loose bolts or screws periodically to maintain stability. Inspect the blade for wear or damage and replace it as needed. Store the saw in a dry, clean environment when not in use. Refer to the manual for specific maintenance recommendations tailored to your model.
Common issues with your Ryobi miter saw can often be resolved with simple adjustments. If the blade is not cutting straight, check the alignment of the blade and fence. Ensure the miter table is locked securely. For uneven cuts, verify that the saw arm is fully lowered before locking. If the saw vibrates excessively, inspect the blade for damage or imbalance. Consult the manual for specific troubleshooting steps. For electrical issues, disconnect the power and inspect the cord or plug. Lubricate moving parts if the saw feels stiff. Regular maintenance can prevent many of these problems.
Congratulations on completing the Ryobi miter saw instruction manual guide. By following the safety precautions, understanding the tool’s features, and performing routine maintenance, you’ll ensure optimal performance and longevity of your saw. Always prioritize safe operating practices and proper techniques to achieve precise cuts. Regularly inspect and maintain the blade and components to prevent wear and tear. If issues arise, refer to the troubleshooting section for quick solutions. This manual serves as your comprehensive guide to mastering your Ryobi miter saw. Happy woodworking!